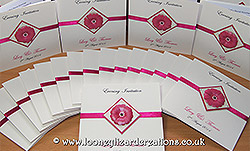
When making greeting cards or any craft for that matter, it is important to keep a clean work surface, not to mention clean hands. I know this sounds pretty obvious, but one little mark on your hard work can mean its heading straight to the bin and having to start from scratch. You really don’t want to be sending out your cards with any imperfections, or they “the customer” certainly won’t be coming back in the future.
It does take a degree of perfectionism and care to keep your crafts in that pristine perfect condition, but all too often no matter how hard you try, some dirty grubby little mark manages to make its way onto your almost finished item. Now we can’t exactly sit in a clean room wearing some form of hazmat suit and mask, how impractical would that be, not to mention stifling ones creativity.

So after years of working with craft materials I have now refined my techniques that allow me to keep my work environment fun and creative whilst keeping my work looking fab! I personally think despite sounding obvious these tips should not be understated and only take a couple of minutes to prepare:
- Before starting any craft session, clean and dry your work surface and cutting mats. I forgot once that the surface was not completely dry and oooops another card in the bin.
- Wash your hands and don’t forget your forearms. Plenty of sneaky smudges can rub off into the danger zone.
- Give your key tools a quick wipe, especially the ruler’s edge! Pencils, charcoal, inks and all sorts gather up on your ruler. The same goes for scissors and the all-important cutting knife.
What do i do? I have still managed to mark my card
So what happens if after taking all these precautions you still manage to let that annoying little mark deface your work of art? Well, never fear you can always call in the backup and keep that trusty little putter rubber to hand; it’s a real life saver when removing difficult marks or blemishes that find their way on to your cards. The trick is to squeeze an edge into a finer point and gently dab the affected area (one or two times) and the putty should pull off the foreign invading bodies without leaving a mark.
On occasion it’s wise to gently rub the area in one direction to remove more difficult marks, but this can leave a subtle oily looking smudge that you can see when you move in the light. Now depending on the material you are applying the putty to, you can (lightly) moisten a bit of tissue/toilet paper and clean off any residue.
Well that’s it! Despite this craft tip sounding like I am stating the obvious, I hope that this short tip is useful to all the crafters out there keeping your work looking its best.


